Quick Start (Redirect)
This quick start demonstrates how to initiate a Visa card deposit using the Redirect Integration Option (with PXP Financial Hosted Payment Pages).
Do not use Sandbox attribute in iFrameIf the merchant is displaying the PXP Financial Checkout in an iFrame, then the merchant iFrame must not use the Sandbox attribute!
Step 1: Call getRedirectData
Use Google Chrome with Postman for example to POST (over https) the following request to Payment Service:
URL:
https://api.test.pxpfinancial.com/PaymentRedirectionService/PaymentRedirectionService.svc/pox/getRedirectData
Headers:
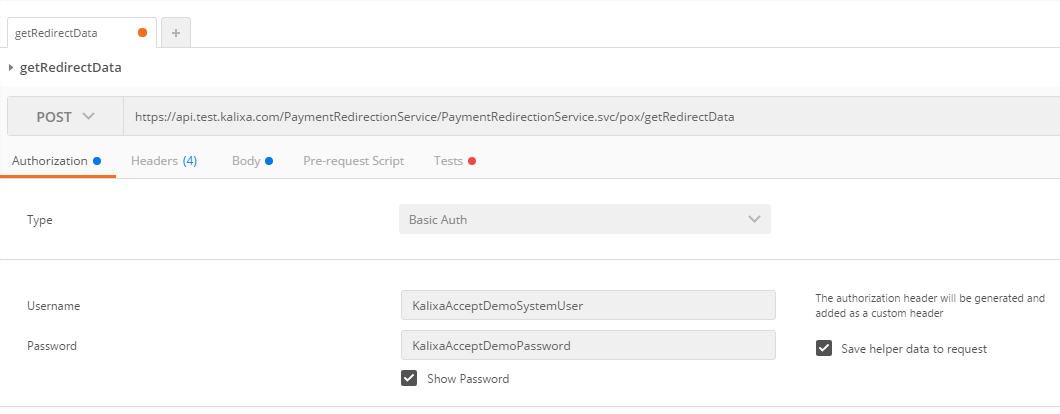
Authorization = Basic base64({username}:{password})- can be set automatically by the Authentication screen in Postman
Content-Type = application/xml; charset=utf-8- can be automatically set by using the Body screen in Postman
The below screen of Postman automatically creates the Authorization header.

Body:
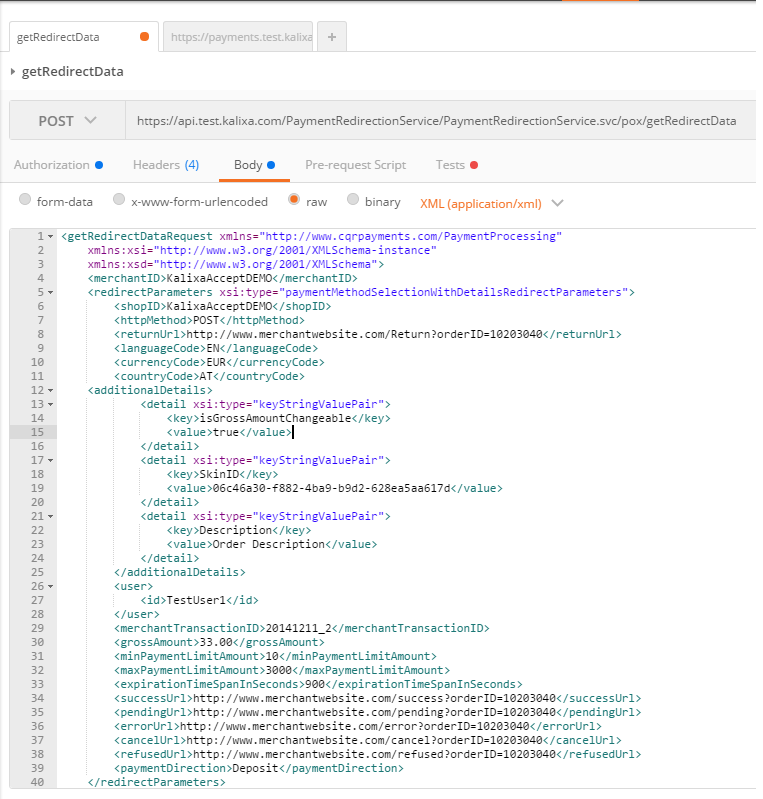
Choose "Raw" and then application/xml, which automatically sets the Content-Type header. The headers will finally look like this:

Paste the below in the Body field:
<getRedirectDataRequest xmlns="http://www.cqrpayments.com/PaymentProcessing"
                        xmlns:xsi="http://www.w3.org/2001/XMLSchema-instance"
                        xmlns:xsd="http://www.w3.org/2001/XMLSchema">
  <merchantID>KalixaAcceptDEMO</merchantID>
  <redirectParameters xsi:type="paymentMethodSelectionWithDetailsRedirectParameters">
    <shopID>KalixaAcceptDEMO</shopID>
    <httpMethod>POST</httpMethod>
    <returnUrl>http://www.merchantwebsite.com/Return?orderID=10203040</returnUrl>
    <languageCode>EN</languageCode>
    <currencyCode>EUR</currencyCode>
    <countryCode>AT</countryCode>
    <additionalDetails>
      <detail xsi:type="keyStringValuePair">
        <key>SkinID</key>
        <value>06c46a30-f882-4ba9-b9d2-628ea5aa617d</value>
      </detail>
      <detail xsi:type="keyStringValuePair">
        <key>Description</key>
        <value>Order Description</value>
      </detail>
    </additionalDetails>
    <user>
      <id>TestUser1</id>
    </user>
    <merchantTransactionID>20141211_2</merchantTransactionID>
    <grossAmount>33.00</grossAmount>
    <expirationTimeSpanInSeconds>900</expirationTimeSpanInSeconds>
    <successUrl>http://www.merchantwebsite.com/success?orderID=10203040</successUrl>
    <pendingUrl>http://www.merchantwebsite.com/pending?orderID=10203040</pendingUrl>
    <errorUrl>http://www.merchantwebsite.com/error?orderID=10203040</errorUrl>
    <cancelUrl>http://www.merchantwebsite.com/cancel?orderID=10203040</cancelUrl>
    <refusedUrl>http://www.merchantwebsite.com/refused?orderID=10203040</refusedUrl>
    <paymentDirection>Deposit</paymentDirection>
  </redirectParameters>
</getRedirectDataRequest>
Postman should look like this:

After pressing the Send button you should see the following:
<getRedirectDataResponse xmlns="http://www.cqrpayments.com/PaymentProcessing" xmlns:xsd="http://www.w3.org/2001/XMLSchema" xmlns:xsi="http://www.w3.org/2001/XMLSchema-instance">
    <redirectData xsi:type="redirectDataWithPost">
        <redirectUrl>https://payments.test.pxpfinancial.com/Checkout/PaymentMethods/</redirectUrl>
        <dataFields>
            <dataField>
                <key>requestData</key>
                <value>kjtuu2tyekoja2fpyeq5wodw_a644a246-289a-4eba-b1eb-b6879e0c5c5c</value>
            </dataField>
        </dataFields>
    </redirectData>
</getRedirectDataResponse>
Step 2: Redirect to PXP Financial Hosted Payment Pages
Save the following html/javascript to a file. Replace {REQUEST_DATA} with the value of the getRedirectDataResponse.redirectData.dataFields.dataField with key equal to "redirectData":
<html>
	<head>
		<meta http-equiv="content-type" content="text/html;charset=utf-8"/>
	</head>
	<body>
		<form name="input" action="https://payments.test.pxpfinancial.com/Checkout/PaymentMethods/" method="post">
			<input type="text" name="requestData" value="{REQUEST_DATA}"/>
			<input type="submit" value="Submit"/>
		</form>
	</body>
</html>
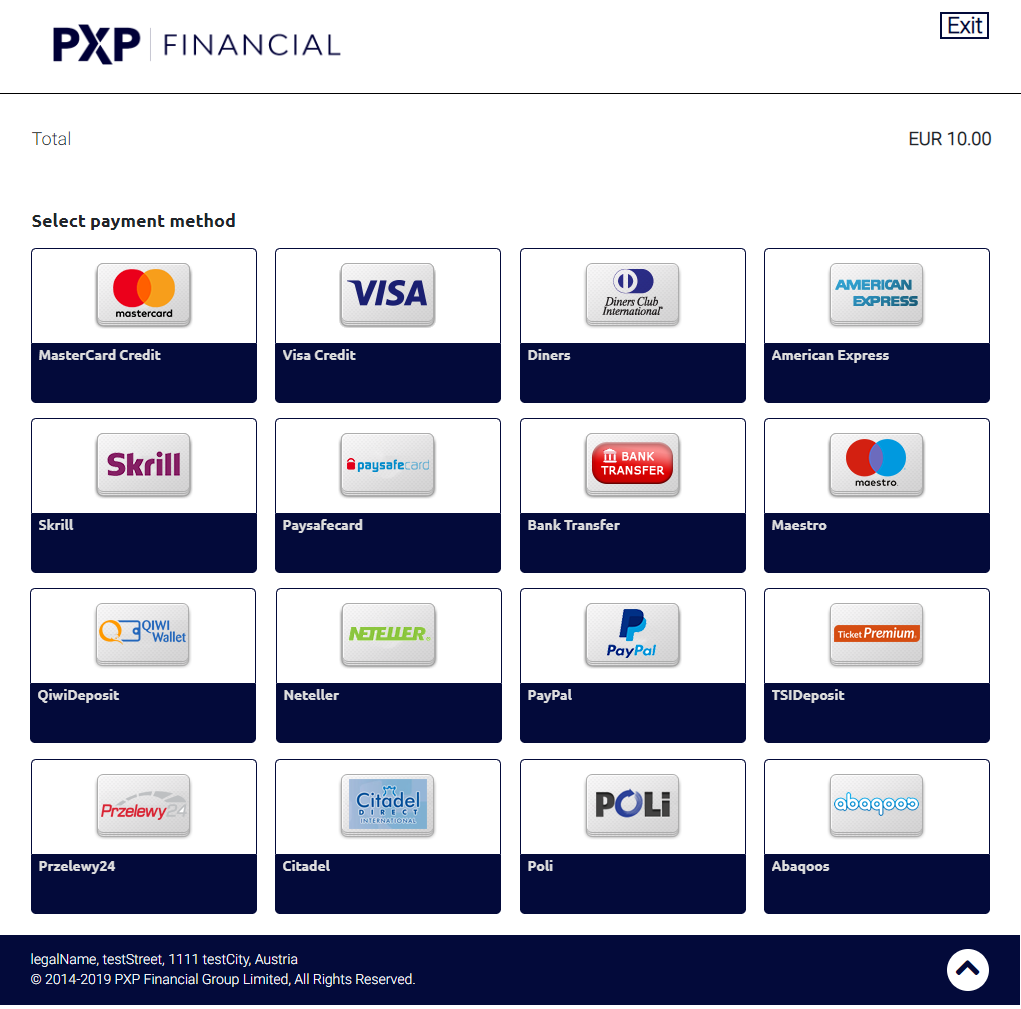
Open it with a browser, click the Submit button and you will be redirected to the PXP Financial Hosted Payment Pages:

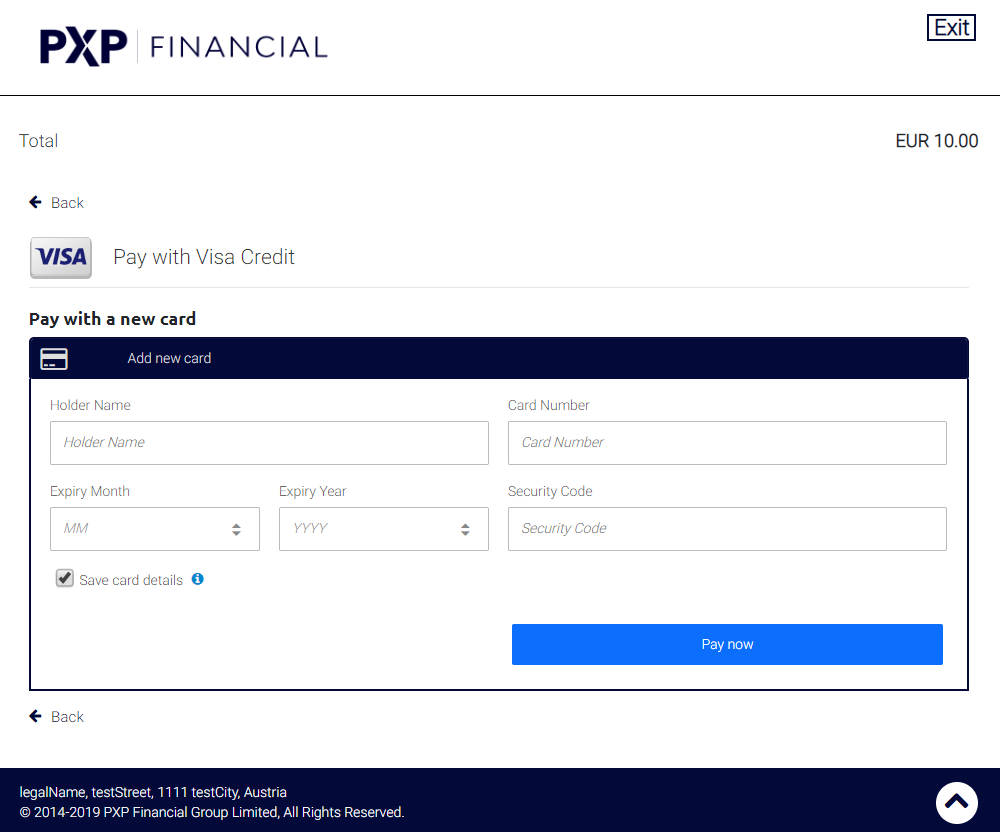
Choose Visa Deposit

Enter the following test values into the form:
- Holder Name: TestUser
- Expiry Month: 12
- Expiry Month: 2025
- Card Number: 4111111111111111
- CVC: 111
and press "Deposit now" or "Pay Now". You will be redirected to the success URL supplied previously in getRedirectDataRequest.redirectParameters.successUrl.
Examples:
- No shop fee applied (usual case):
http://www.merchantwebsite.com/success?am=3300 - Shop fee applied
http://www.merchantwebsite.com/success?am=3300&fee=165
Note: Shop fees can be configured per merchant, shop and payment method and can be a percentage fee or fixed amount or a combination of both. The PXP Checkout would calculate the fee amount based on the payment amount and add it to the total amount (=surcharge). It is important to ensure that this action complies with any applicable laws that pertain to the merchants business or payment country.
The Merchant application should at this point not yet mark the order as paid, or credit the customer's account with the money, as the above request can be easily manipulated.
Instead the merchant should implement a notification listener, which will be notified in the background by PaymentService at approximately the same time as the customer's redirection back. For more information see Process Notifications
Updated 9 months ago
