Design a Merchant Custom Skin
Page Structure
The PXP Hosted Payment Pages are structured in three main parts:
- Header (containing merchant logo and name)
- Payment Section
- Footer
In the Header the merchant can add a logo of its choice and change the layout styles by making changes in the theme.less file. The merchant’s company name will be displayed next to the logo by default.
The layout styles of the Payment Section can be changed by making changes in the theme.less file. No other changes than the layout style changes are allowed.

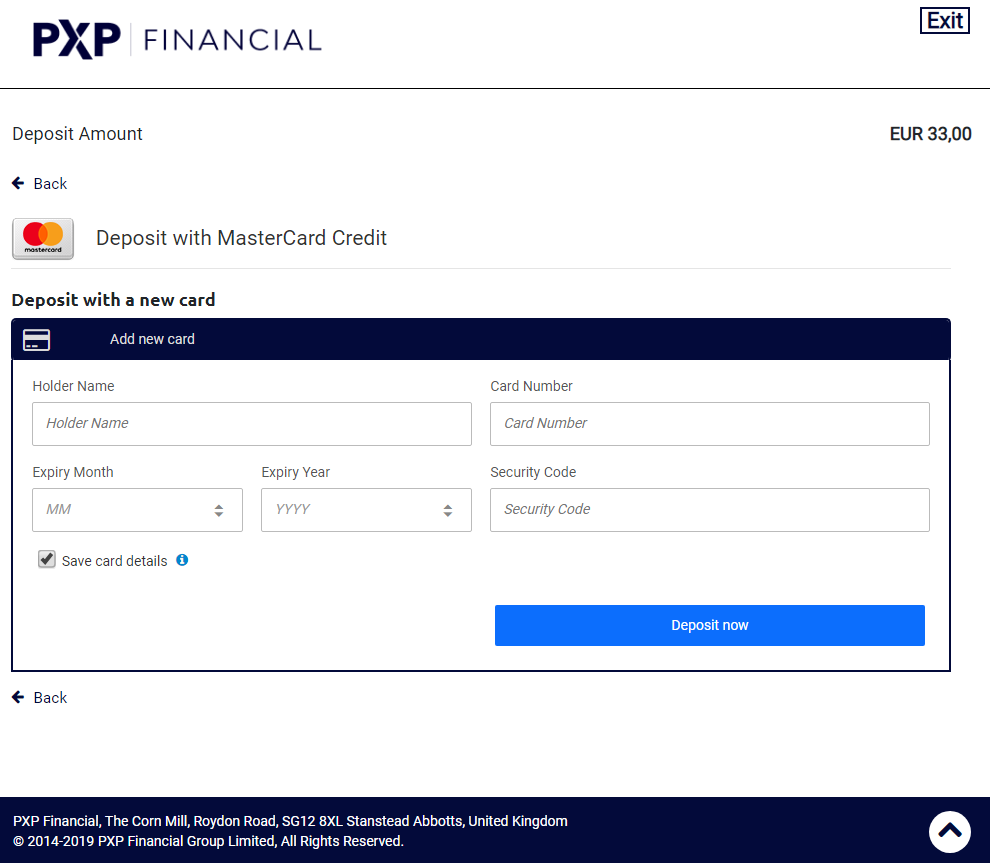
The below screenshots show examples of the Payment Selection Page and the Payment Detail page in default configuration:

Template package
PXP provides a template package of PXP branded Hosted Payment Pages. The content of this package consist of the following files: base.less, variables.less, fonts.less, theme.less and logo.png.
The Skin Files of the PXP template package can be downloaded here as a ZIP file or requested from the PXP Support Team [email protected].
If preferred, here are the direct links to each file in this package:
Here are URLs for the individual files too:
-
[base] (https://www.pxpfinancial.com/hubfs/PXP_PSA_Skin/base.less)
-
[fonts] (https://www.pxpfinancial.com/hubfs/PXP_PSA_Skin/fonts.less)
-
[logo] (https://www.pxpfinancial.com/hubfs/PXP_PSA_Skin/logo.png)
-
[theme] (https://www.pxpfinancial.com/hubfs/PXP_PSA_Skin/theme.less)
-
[variables] (https://www.pxpfinancial.com/hubfs/PXP_PSA_Skin/variables.less)
The first three files (base.less, variables.less and fonts.less) must not be modified. Those files are reference files which are included in the package to enable the merchant's developers to test and preview the skin layout locally.
The theme.less file contains all the desired styles which can be modified.
The provided image file (logo.png) is a sample logo of PXP. The merchant should replace the sample image file with the merchant’s logo file.
After the layout style modification has been done by the merchant’s web developer the following files have to be uploaded to the SkinManagement interface in the PXP Admin Tool: theme.less and logo.png. On the basis of the theme.less and logo.png changes, PXP Payment Service will build the merchant branded payment pages at runtime.
See Upload and Activate a Merchant Custom Skin for more information.
To preview the skin locally, the provided file paths in the theme.less file should not be changed. These are the original paths for working locally: @import "variables.less"; and @import "base.less".

To preview the skin in the PXP Admin Tool, the provided file paths in the theme.less file have to be modified to the new file paths: @import "....\variables.less"; and @import "....\base.less".

Branding Process – Step by step description
The below flow chart describes the necessary steps that need to be performed by a merchant to create its own layout for the PXP Hosted Payment Pages.
- Download the PXP provided template package locally (consist of following files: base.less, variables.less, fonts.less, theme.less and logo.png).
- Adapt the theme.less and logo.png files with preferred look and feel.
- Preview the adapted skin locally (please retain the provided file paths in the theme.less file) and make further corrections/adaptations if necessary.
- Modify the provided file paths in the theme.less file to the new file paths (@import "....\variables.less"; and @import "....\base.less").
- Upload theme.less and logo.png files to PXP Payment Service via the SkinManagement interface (“NewSkin”) in the PXP Admin Tool – in the PXP Test Environment.
- Preview the saved skin on the “Skins Detail Page” in PXP Admin Tool after upload.
- If the layout does not look as expected adapt the Less file and/or Image file and upload them again on the “Skins Detail Page” in PXP Admin Tool or save a new skin with the new files under “NewSkin” in PXP Admin Tool.
- When the layout meets the expected look and feel, activate the skin for a shop in the test environment (go to “Skins”, select merchant+shop, activate the relevant skin).
- Perform tests on the test environment (create getRedirectURL requests and verify the layout is okay).
- After these steps are tested okay, perform upload, preview and activate the skin on the LIVE system via the PXP Payment Service Admin Tool (live instance).

Layout Changes - Examples
The following sub-sections provide information with basic examples how the layout of the PXP Hosted Payment Pages can be changed by making the relevant adaptations in the theme.less and logo.png file.
The provided examples are kept simple and show only the basic part of possible design options.
Changing the basic style of the Payment pages (colours)
The following example shows how the background colours can be changed (e.g. to red).
@primary-accent-color:#AA0A33;
@primary-header-color:#FF356B;
Changing colour of error messages on payment detail pages
Error messages are shown above the text input fields. By changing the styles in the theme.less file the merchant can tailor the error field border colour(@error-field-border-color: #ff0000;) and the error field background colour (@errorfield-background-color: #ffcccc;).
@error-field-border-color: #ff0000;
@errorfield-background-color: #ffcccc;
The below screenshot shows how error messages are displayed in the default layout:

Changing Exit Link Style
By default, the text “Exit” (translated to other languages) is shown in the Exit Button Link.

This can be changed in the theme.less file. Instead of the text, an icon can be shown (see screenshot).

The following screenshot shows the default settings (left side, orange) and the changes which need to be made to show an icon instead of the text (right side, yellow) – in the theme.less file (backlinkIcon, backlinkText).

Changing the Company Logo
To change the company logo which is displayed on top of the payment pages in the Checkout, the merchant logo has to be uploaded as valid png Image file with filename “logo.png” during the Skin creation/upload process in the PXP Payment Service Administration Tool. See Upload and Activate a Merchant Custom Skin for more information.
Changing the Label of the Transaction Description in the Amount header
Default Transaction Description:
The default transaction description which is used and displayed in the header line where the payment amount is displayed depends on the classification of the merchant (merchant category code).
This default description is shown in case it is not overwritten via the getRedirectData request (see next chapter).
| Merchant Category | Default Description |
|---|---|
| Any except the below | Total |
| Betting, Gaming, Gambling, Financial (7995, 7994, 6211) | Deposit Amount |
The screenshot below shows the default value for a betting merchant (MCC-code is 7995) “Deposit Amount” in the payment amount header:

Changing the Description per transaction (via getRedirectData request):
The default description label of the payment amount field can be overwritten on every redirect call. For this purpose, the field description in the additionalDetails section of the getRedirectData request needs to be used as shown in the example below.
The following parameter needs to be provided in getRedirectData.additionalDetails:
| key (value type, account type, required) | value |
|---|---|
| description (string, optional) | The payment purpose/description for the particular payment. |
Example:
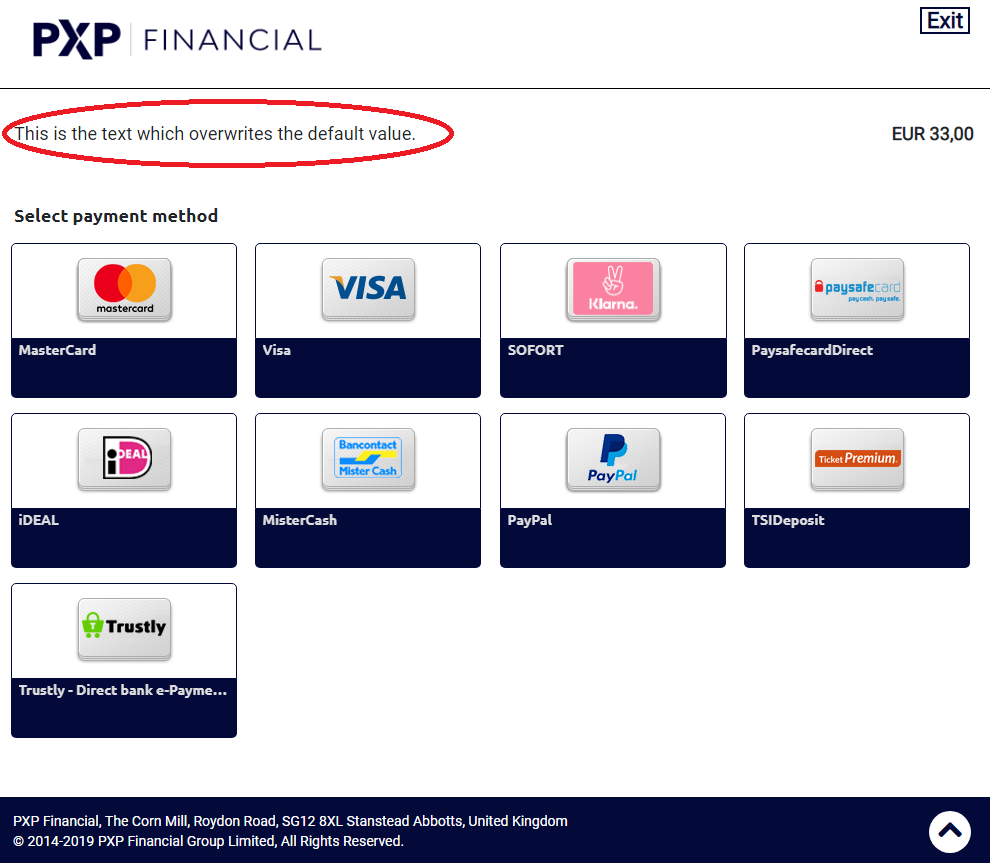
<additionalDetails>
<detail xsi:type="keyStringValuePair">
<key>description</key>
<value>This is the text which overwrites the default value.</value>
</detail>
</additionalDetails>
The below screenshot shows how the above description is applied on the Payment Selection Page:
Updated about 1 year ago